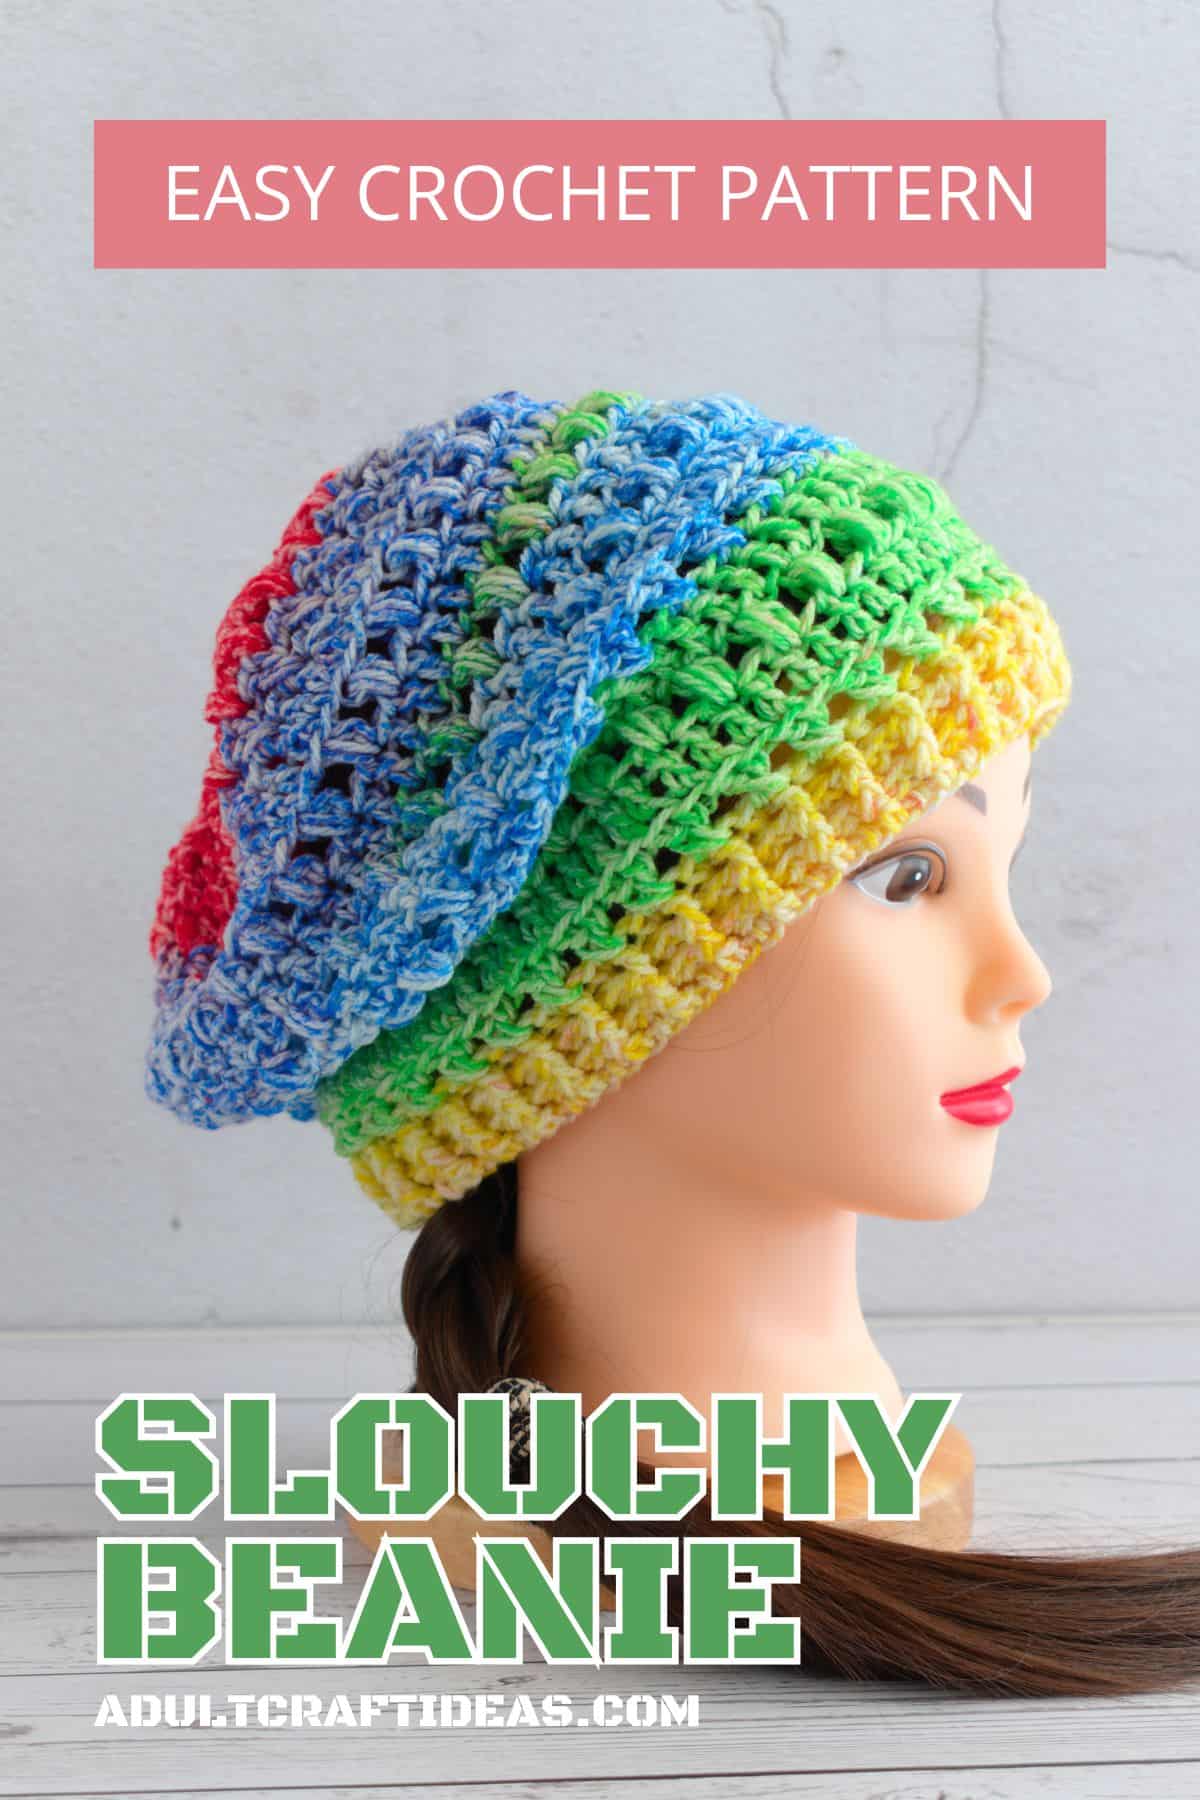
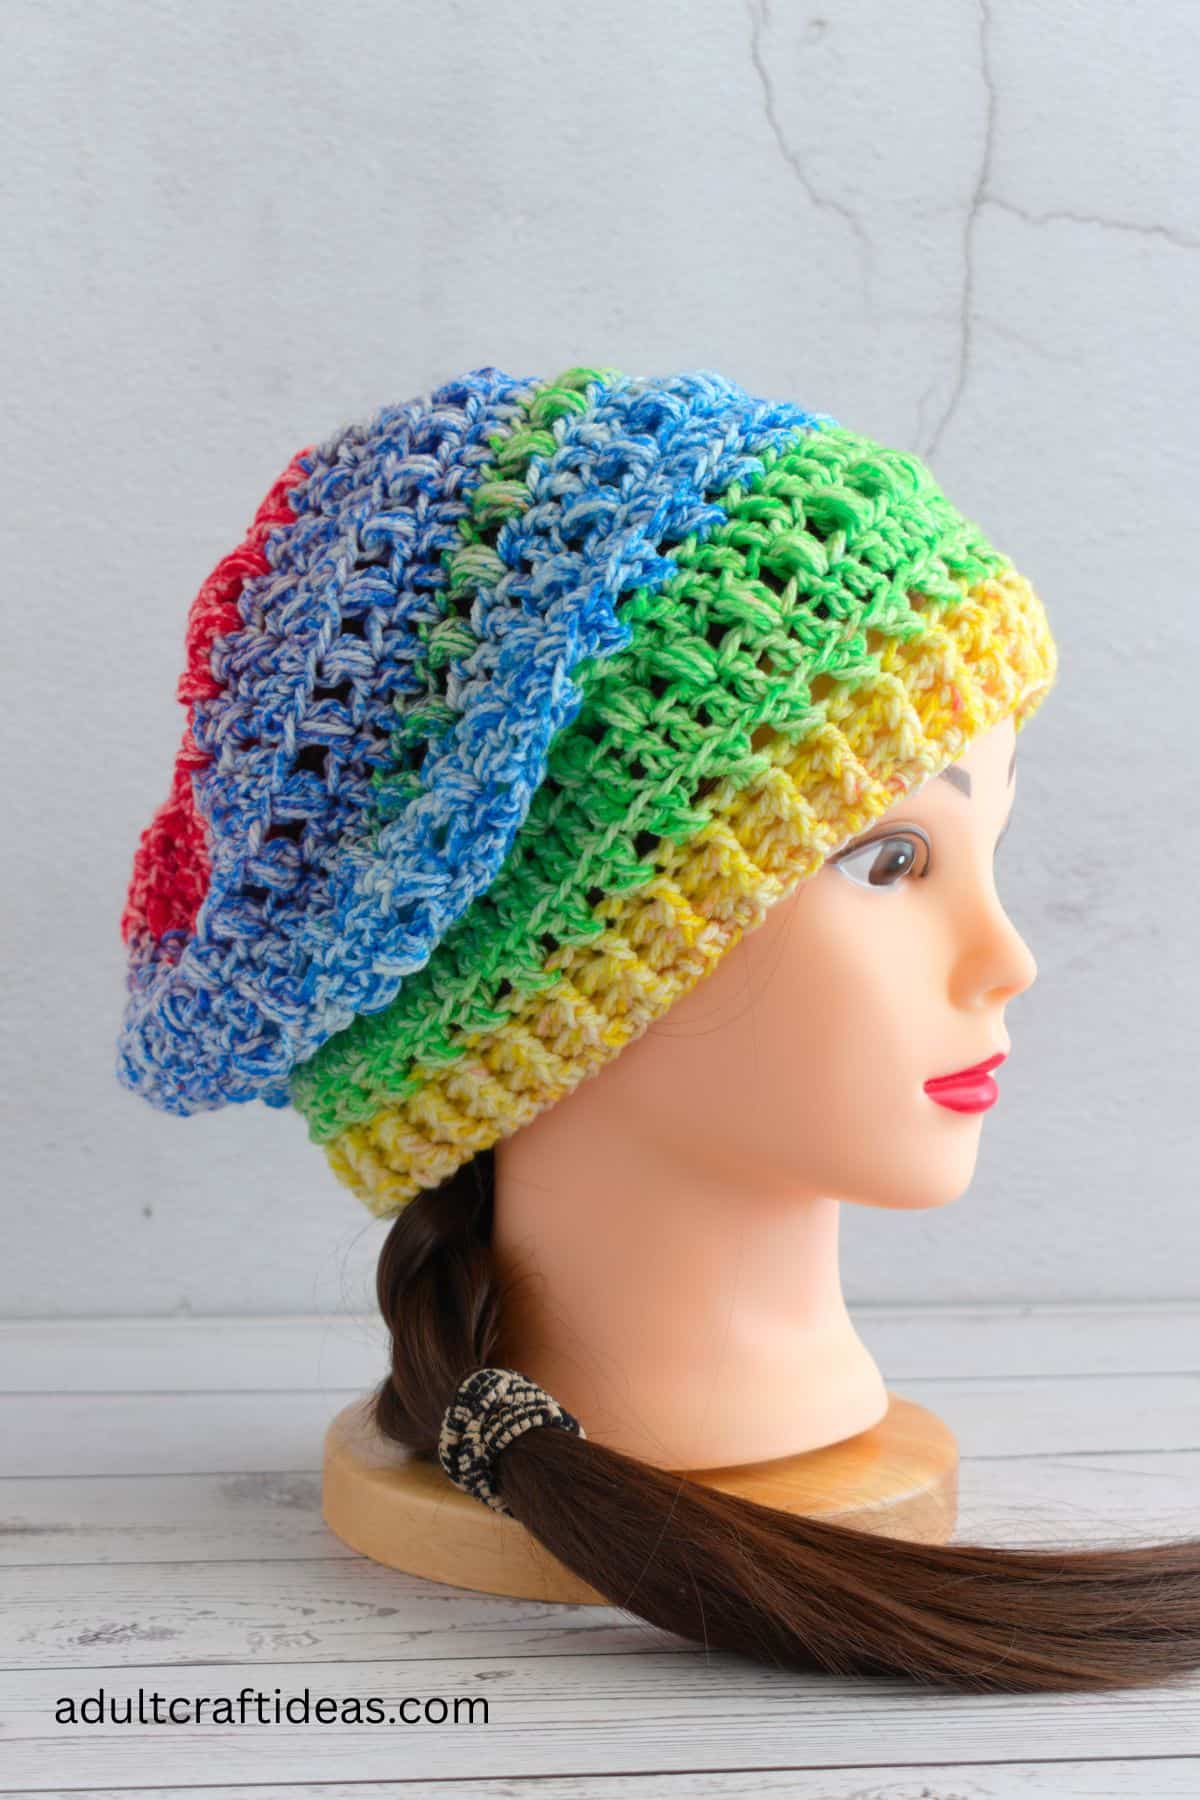
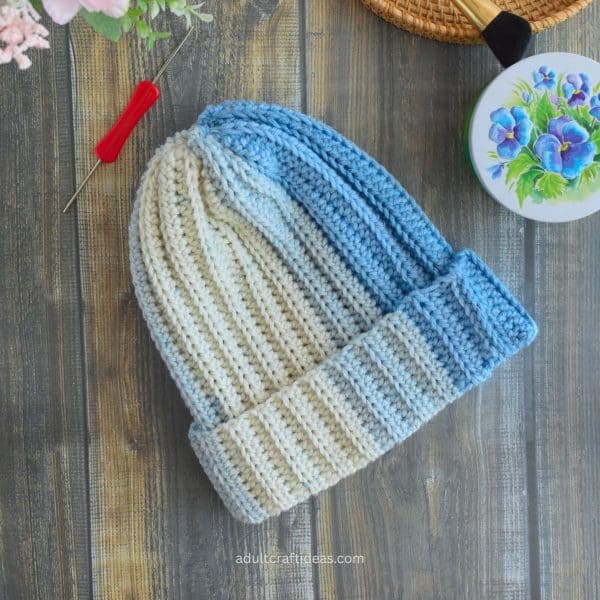
This slouchy crochet beanie pattern is worked from the bottom up, with a neat front post and back post ribbed band and a lovely open, airy texture.
The main body is made with puff stitches and crossed double crochet stitches, giving it a unique, eye-catching look.
Made with soft #3 light yarn, it's the perfect hat for spring or fall - just enough warmth without feeling heavy.
You can make it in about 2-3 hours, so it's quick, cozy, and fun to crochet!
When the weather starts to cool down but isn't quite cold enough for a thick winter hat, a slouchy crochet beanie is the perfect solution.
Light, breathable, and full of texture, this pattern is great for spring and fall days when you just need a little extra warmth.
This beanie is worked from the bottom up, starting with a narrow band made of front post and back post double crochet stitches.
This gives the edge a clean, stretchy ribbed look that fits nicely around your head without being tight.
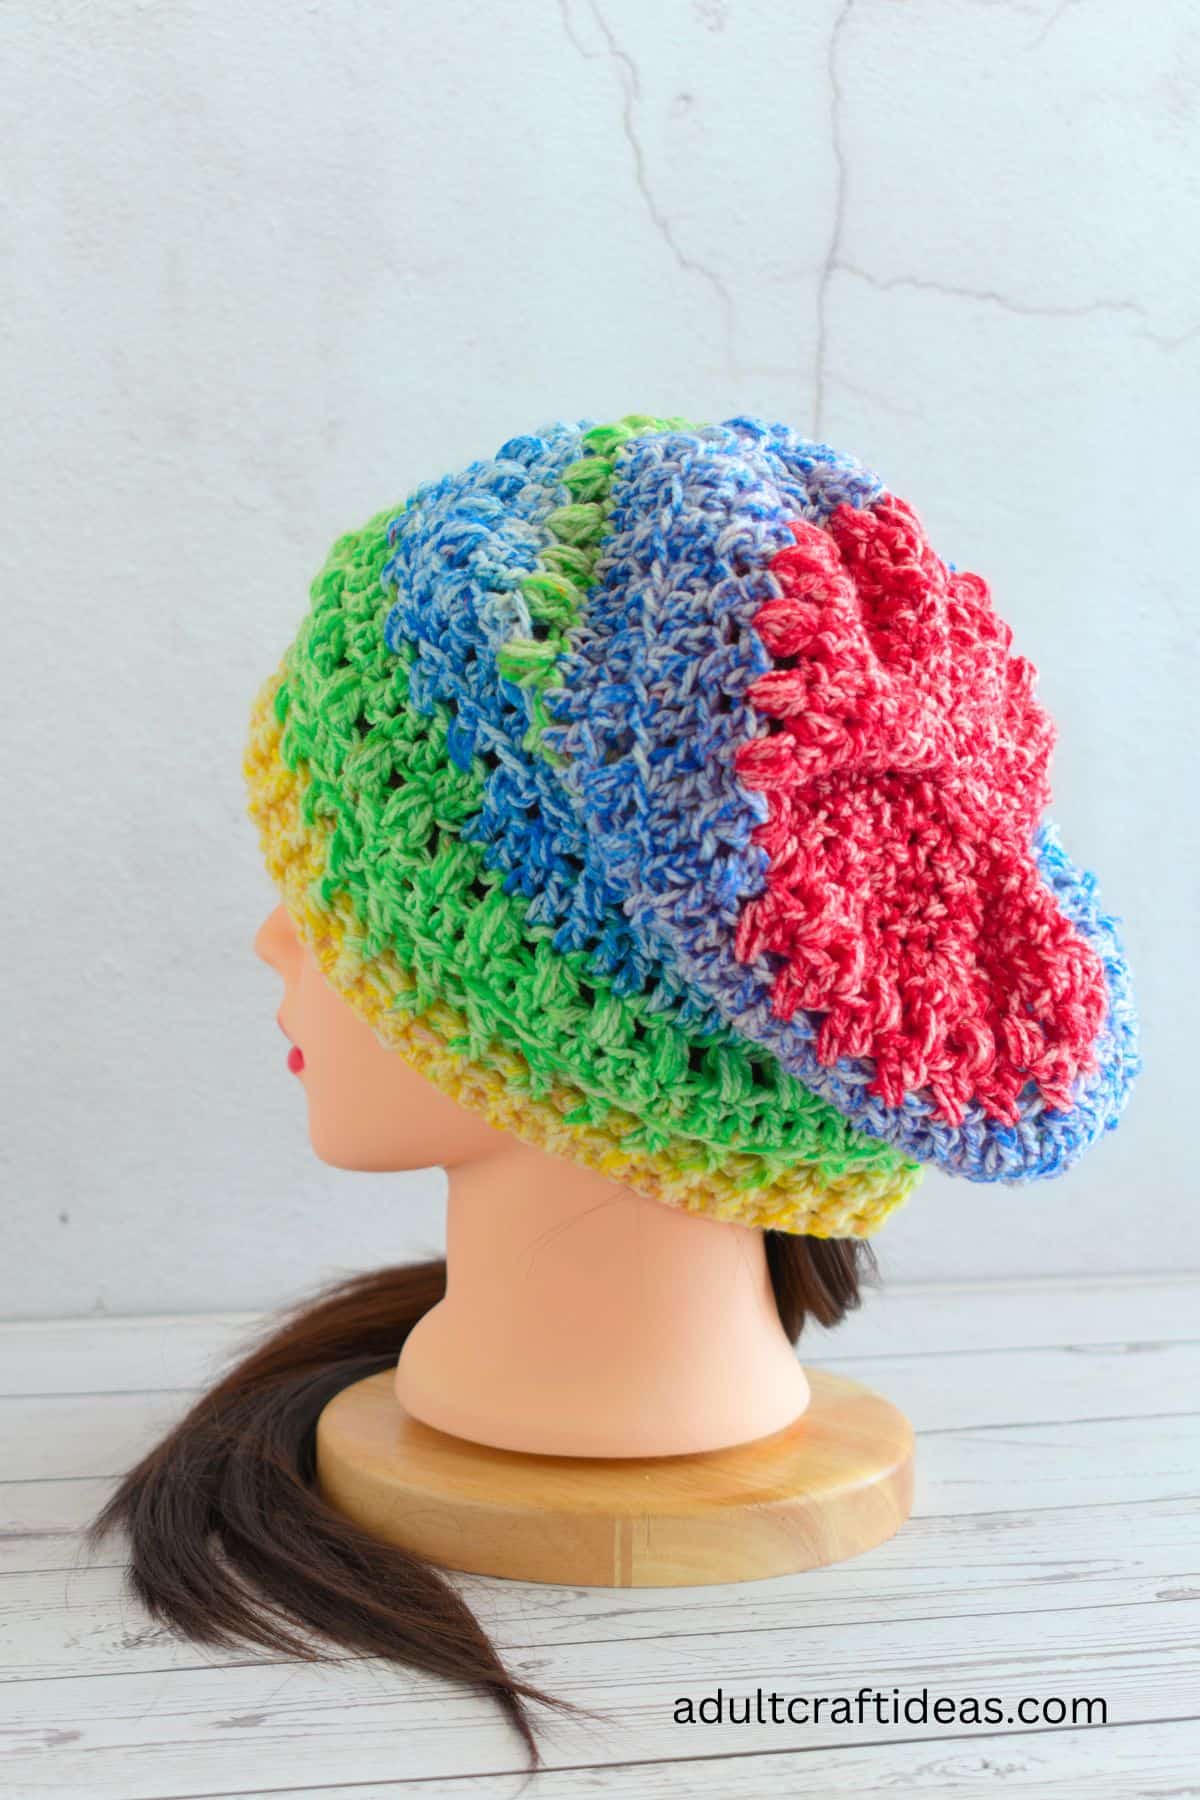
From there, the rest of the hat is built with a mix of puff stitches and crossed double crochet stitches - a beautiful pairing that creates a soft, open texture while keeping the hat lightweight and comfortable.
The puff stitches add just the right amount of squishy texture, while the crossed double crochets give the design a lacy, woven effect.
Together, they make the hat both stylish and breathable - ideal for wearing on breezy spring mornings or cool fall afternoons.
You can make this slouchy beanie in about two to three hours, which makes it perfect for an evening project or a last-minute handmade gift. It's an easy pattern to follow, even if you're still building confidence as a crocheter. Plus, it looks beautiful in solid colors, stripes, or soft variegated yarns.
Whether you're making it for yourself or as a handmade gift, this slouch beanie crochet pattern is sure to become one of your favorites.
Table of 'contents
- Why You'll Love This Pattern
- About the Design
- Choosing the Right Yarn
- Tips for Success
- Styling and Wearing Ideas
- Customization Ideas
- Finished Size
- Gauge
- Materials Needed
- Abbreviations to Remember (US terms)
- Pattern Notes
- Instructions - Slouchy Crochet Beanie
- Finish
- Pattern FAQS
- More Easy Crochet Patterns
- Comments
Why You'll Love This Pattern
- Light and Breathable - Perfect for spring and fall - and offers just enough warmth without bulk.
- Beautiful Texture - Combines puff stitches and crossed double crochets for an eye-catching design.
- Comfortable Fit - The front post and back post band keeps the hat snug without feeling tight.
- Quick Project - Finish in about 2-3 hours, even if you're a beginner.
- Stylish Slouch - The relaxed shape gives a modern, casual look.
- Customizable - Easy to adjust the height or slouch to your liking.
About the Design
This slouchy crochet beanie pattern begins with a narrow ribbed band, worked in rounds using front post and back post double crochet stitches.
This technique creates a stretchy, flexible brim that keeps its shape beautifully. Once the band is complete, you'll move on to the main body of the hat.
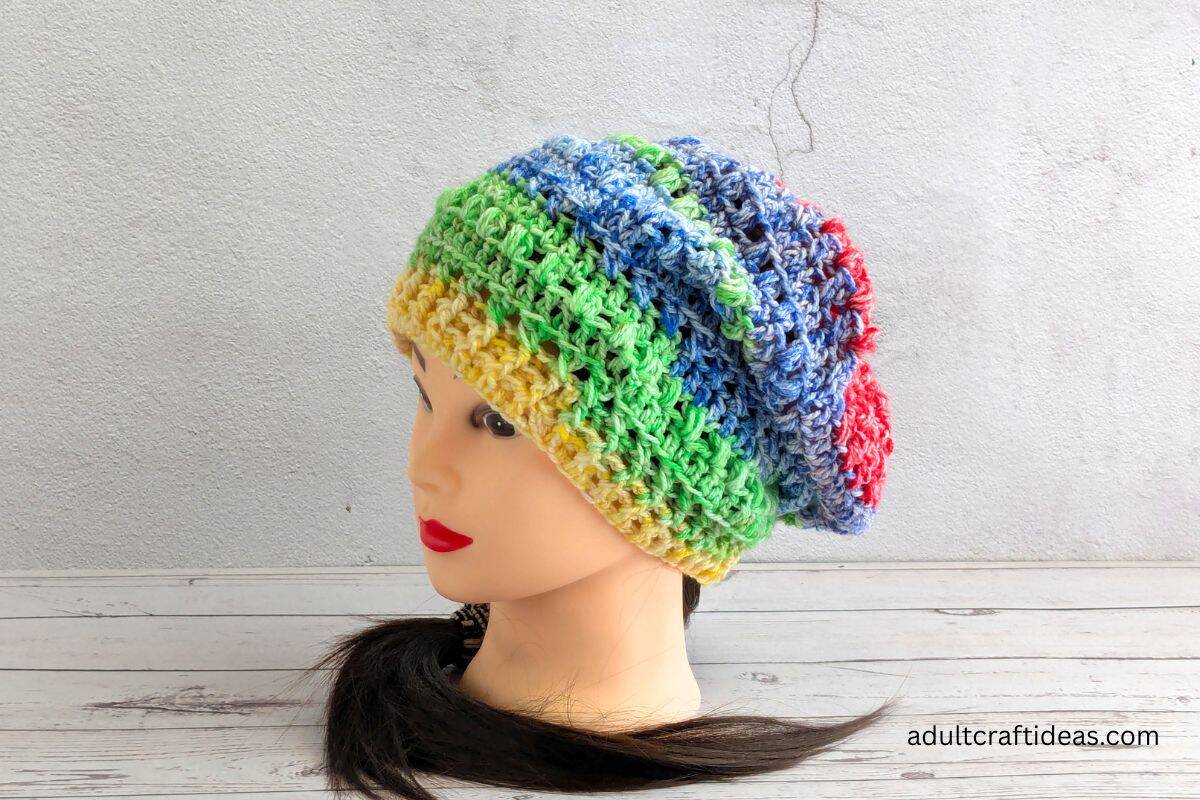
Here's where the fun begins - the texture pattern. The body of the hat alternates between puff stitch rounds and crossed double crochet rounds, giving it a light, airy look that drapes perfectly.
The puff stitches add soft dimension and a bit of structure, while the crossed stitches help open the fabric, making it breathable and great for warmer days.
Since the pattern is worked from the bottom up, it's easy to adjust the length. Want a little more slouch? Just add a couple of extra rounds before finishing. Prefer a snugger fit? Stop a round or two early.
The hat is finished by decreasing the stitches at the top, keeping the slouchy shape intact. You can leave it as is for a relaxed drape or add a small pom-pom for a playful touch.
Choosing the Right Yarn
This pattern uses #3 light yarn, which keeps the hat soft and flexible.
Cotton blends work beautifully for warmer weather, while acrylic (that's what we used for ours) or bamboo blends add warmth and drape for cooler days.
Tips for Success
- Start the first round in the back bumps of your foundation chain. It gives the brim a neat, professional edge.
- Keep a light tension. Loose stitches help the puff and crossed patterns stand out better.
- Mark your rounds. Use a stitch marker to keep track of your starting point.
- Try it on as you go. Adjust the height if you want more or less slouch.
Styling and Wearing Ideas
This crochet slouch beanie looks great with casual outfits and layers beautifully with scarves or light jackets. You can wear it slightly pushed back for that easy, effortless look or pull it down snugly when the wind picks up.
Because it's made with light yarn, it's not too hot - just cozy enough for in-between seasons. You'll love having it handy for outdoor walks, coffee runs, or cool evenings out.
It also pairs beautifully with a matching ribbed cowl or textured scarf if you want to make a coordinated set.
Customization Ideas
- Add a Pom-Pom - Go for a small yarn pom-pom or even faux fur for a playful look.
- Use Three Colors - Alternate colors for the puff and crossed stitch rounds for a striped effect.
- Make It Longer - Add a few extra rounds before closing the top for more slouch.
- Add a Tag - Sew on a small faux leather or wooden tag for a professional handmade finish.
- Go Neutral or Bright - Neutrals make it classic, while brights make it pop!
Finished Size
Suitable for head sizes 19-21 inches.
Top of beanie down to the brim is about 10 inches (25cm), when laid flat length of brim measures about 9.5 inches (24cm).
Gauge
4x4 inch (10x10cm) = (5.5mm hk) 12 double crochet and 8 rows
Materials Needed
Yarn
#3 light (medium worsted, DK, 8py) yarn with about 12 wraps per inch (WPI)*
- You will need about - 202 yards (185 meters)
*Wraps per inch (WPI) - measures yarn thickness by counting how many times the yarn wraps around a ruler in one inch. More wraps thinner yarn, while fewer wraps thicker yarn.
Crochet hook
- 5.5 mm - brim
- 6 mm - hat
Notions
- Scissors
- Yarn needle
Abbreviations to Remember (US terms)
- BPdc - back post double crochet
- Ch - chain stitch
- Dc - double crochet
- FPdc - front post double crochet
- Hk - hook
- Lp/s - loops/loops
- Puff - puff stitche - see below
- Rpt - repeat
- Sc - single crochet
- Sc2tog - single crochet 2 stitches together
- Sk - skip
- Sl st - slip stitch
- St/sts- stitch/stiches
- YO - yarn over hook
- [ ] - at the end of a round indicates the number of stitches in that round
Special Stitches
Puff - YO, insert hk into st, YO, pull yarn through st (3 lps on hk). YO, insert hk in the same stitch, YO, pull up lp (5 lps on hk). YO, insert hk in same st, YO, pull up lp (7 lps on hk). YO and pull through all lps on hk, ch1.
Pattern Notes
- To start the 1st puff st of a rnd, pull up the loop slightly before making the puff.
Instructions - Slouchy Crochet Beanie
First
Measure the circumference of you head - For this crochet cat beanie I am using a 19 inches (48cm) circumference.
Next
Make a foundation chain that measures your head circumference.
Foundation, 6mm hk - ch70 (or as many as needed to fit around your head - the stitch count must be and even number) sl st into 1st ch to from a ring (be careful not to twist the foundation chain).
Band
Rnd 1, 5.5 mm hk - ch3 (count as dc), 1dc in each st around, sl st into top of ch-3 to join. [70sts]
Rnd 2 - ch3 (count as dc), FPdc around next st, *BPdc around next st, FPdc around next, rpt from * around, the last st should be a FPdc, sl st into top of ch-3 to join. [70sts]
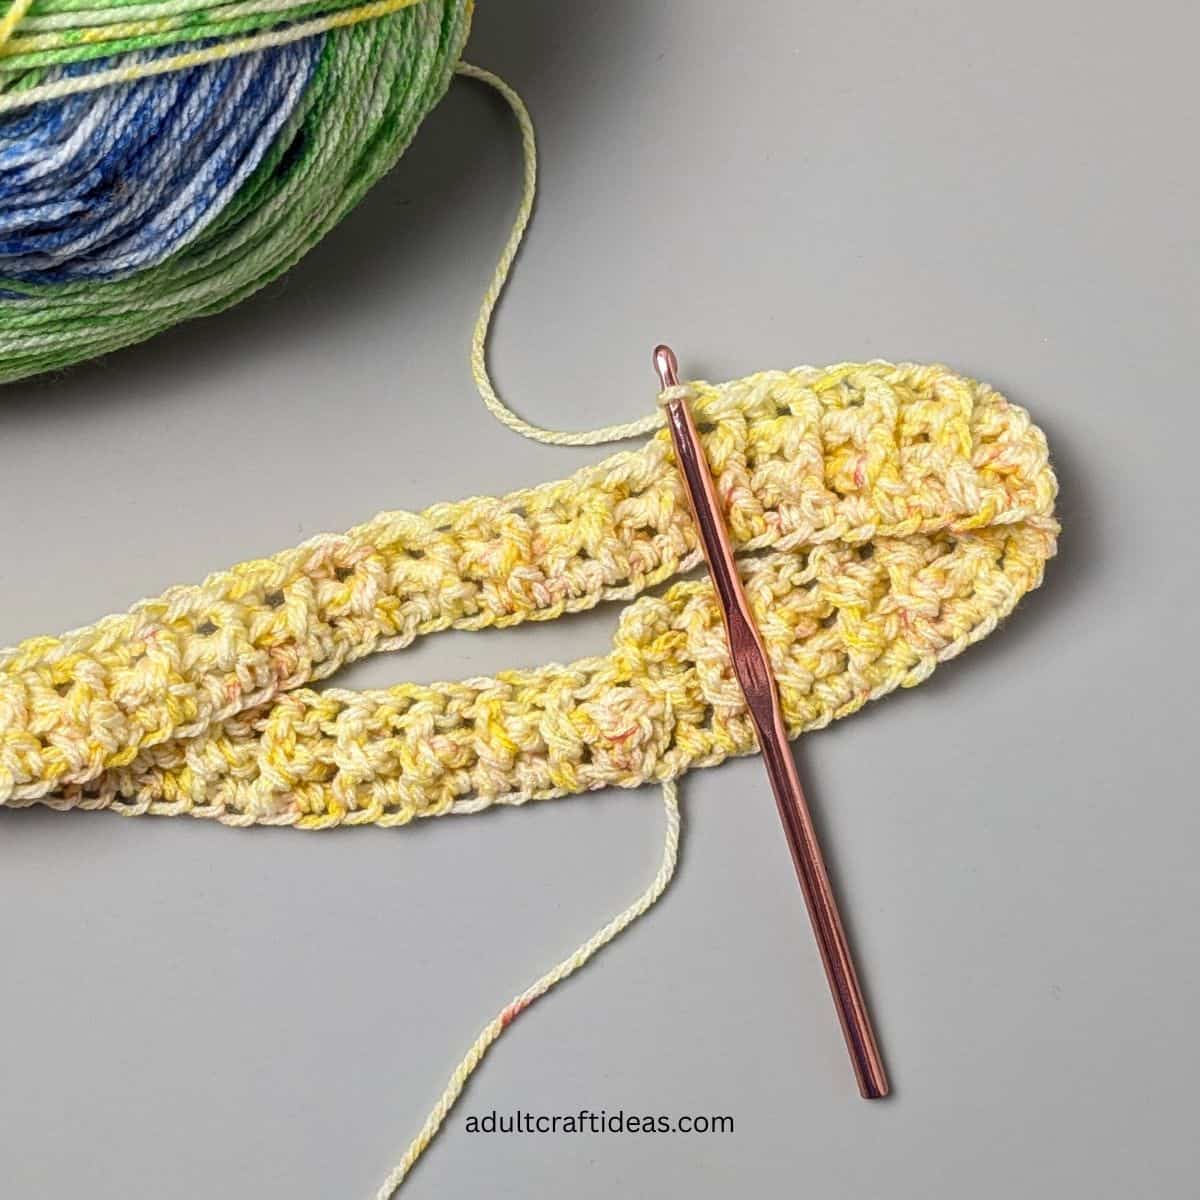
Rnd 3 - ch3 (count as dc), FPdc around next st, *BPdc around next st, FPdc around next, rpt from * around, the last st should be a FPdc, sl st into top of ch-3 to join. [70sts]
Hat body
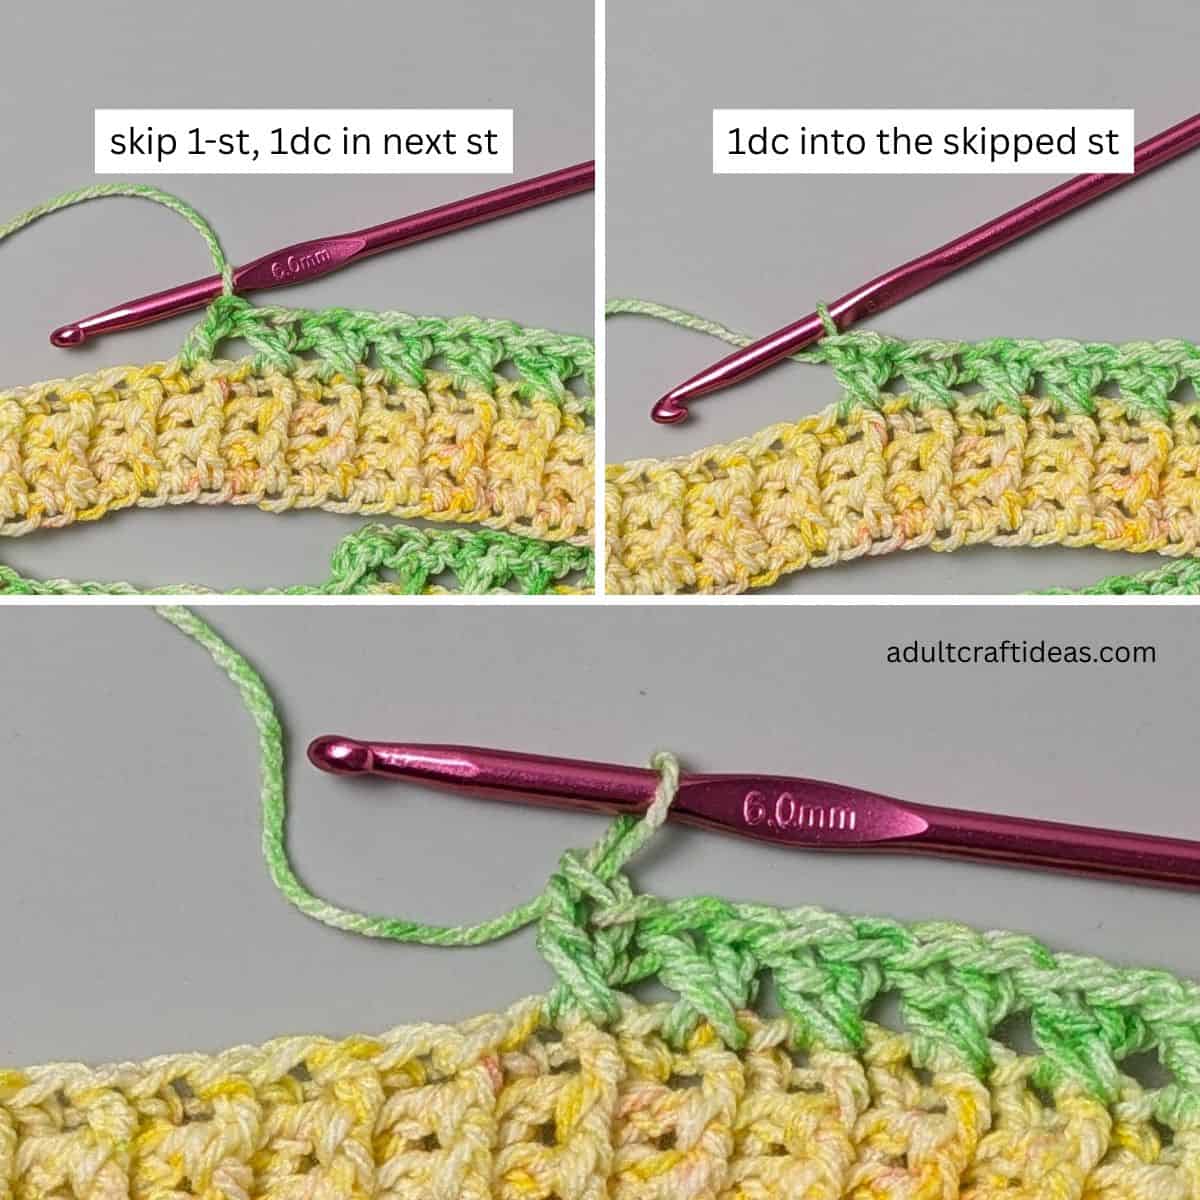
Rnd 4, 6mm hk - ch3 (count as dc), 1dc in the st behind the ch-3, * sk 1-sts, 1dc in the next, 1dc in the sk st, rpt from * around, sl st into top of ch-3 to join. [70sts]
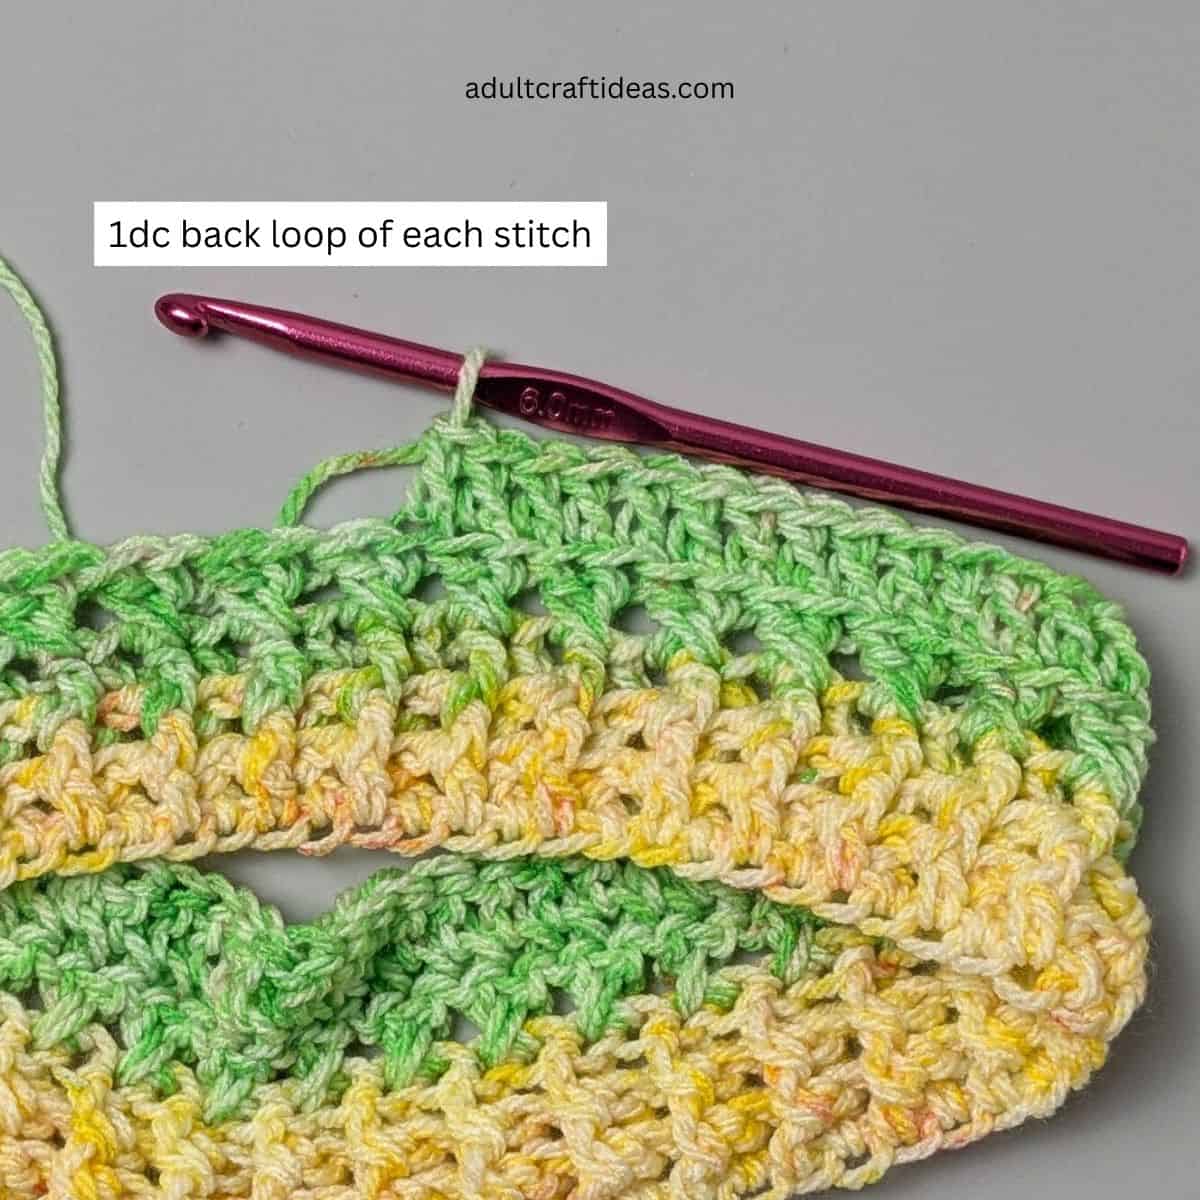
Rnd 5 - ch3 (count as dc), BLdc in each st around, sl st into top of ch-3 to join. [70sts]
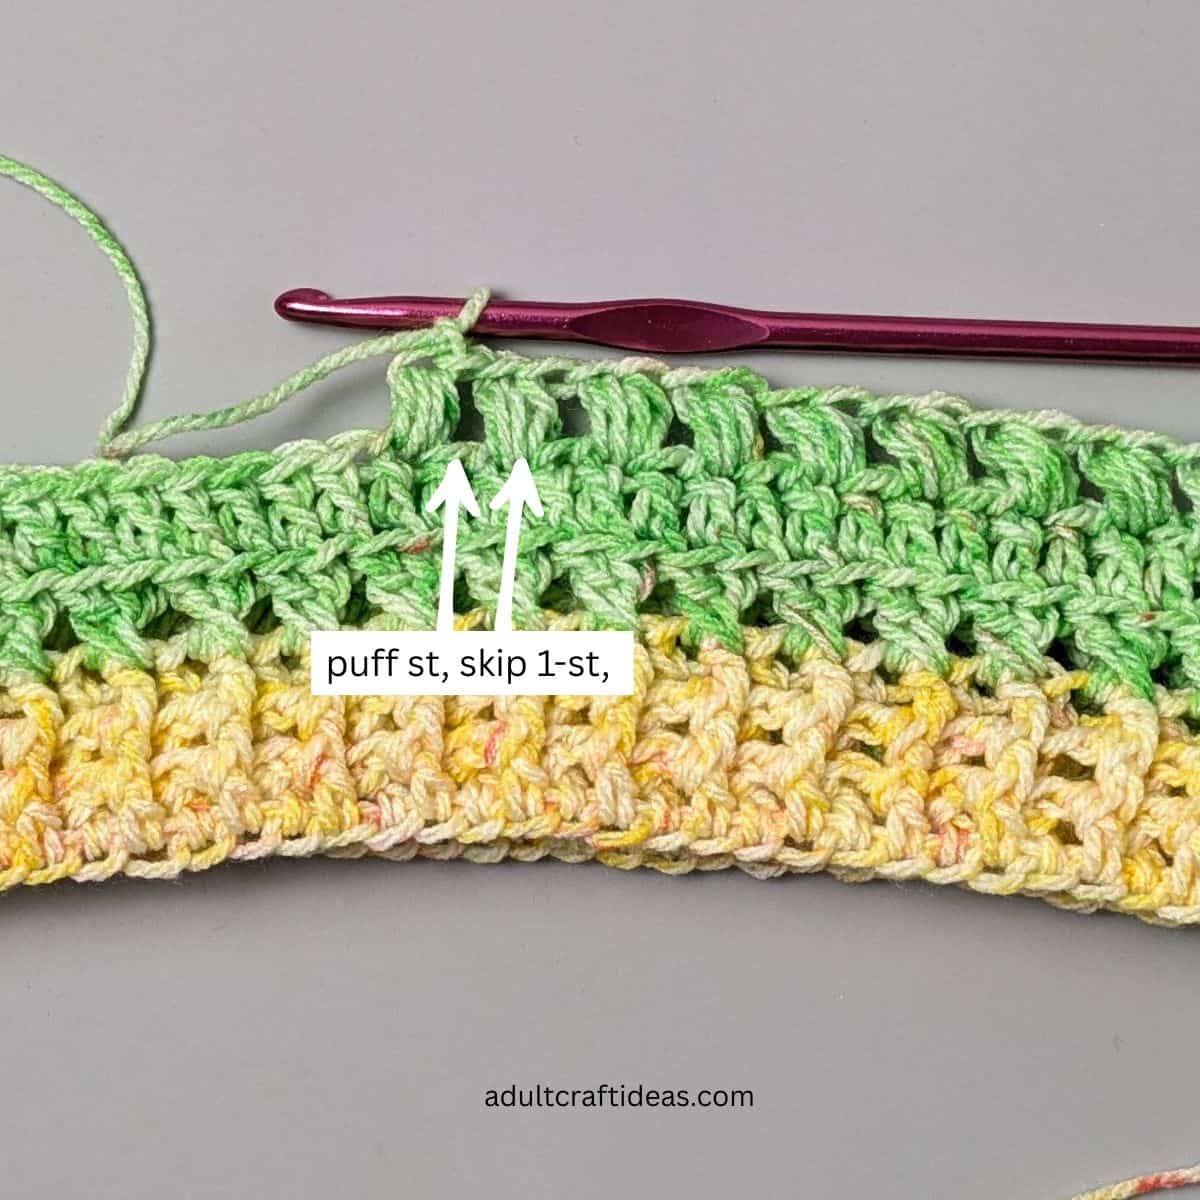
Rnd 6 - puff in the same sp as sl st, sk 1-st, * puff in in next st, sk 1-st, rpt from * around, sl st into top of 1st puff to join. [35 puffs]
Rnd 7 - ch3 (count as dc), 1dc in each st around, sl st into top of ch-3 to join. [70sts]
Rnd 8 - ch3 (count as dc), 1dc in the st behind the ch-3, * sk 1-sts, 1dc in the next, 1dc in the sk st, rpt from * around, sl st into top of ch-3 to join. [70sts]
Rnd 9 - ch3 (count as dc), BLdc in each st around, sl st into top of ch-3 to join. [70sts]
Finish
Use the yarn tail to sew the top of the beanie by weaving the tail in the front loops only of each of the stitches in the last round, then pull tight to close. Weave in ends securely.
Pattern FAQS
Yes, but it will make the hat less airy and more winter - friendly. If you do, go up a hook size and reduce the foundation stitch count to keep the fit right.
Adjust your foundation chain stitch count to measure your head circumference and be sure to end up with an even number of stitches to keep the pattern correct.
More Easy Crochet Patterns
If you like this crochet beanie you might also like this easy ribbed crochet hat, this half double crochet beanie pattern, this quick chenille yarn beanie, this easy crochet adult beanie or these easy patterns:

If you tried this slouch crochet beanie pattern (or any other pattern on my website), please let me know how it went by leaving a comment below. I'd love to hear from you!
Comments
No Comments